> For the complete documentation index, see [llms.txt](https://docs.gojiberry.app/documentation/llms.txt). Markdown versions of documentation pages are available by appending `.md` to page URLs; this page is available as [Markdown](https://docs.gojiberry.app/documentation/quiz/creating-quiz.md).
# Creating quiz
Now that you’ve set up your app, let’s create a product quiz to give personalized product recommendations to your customers while collecting relevant customer data for you.
#### 1. From side menu, click on Product Quiz
#### 2. You may start with one of our templates for a jumpstart, or you may start from scratch.
Starting from a template allows you to quickly create the quiz you want. The templates come with pre-set designs, saving you the effort of working on the visual presentation, along with basic question drafts. Try selecting an industry type close to yours to find the template that best suits your needs.
#### 3. Set the quiz content
In this step, you can define the content to be displayed on each page of the quiz.
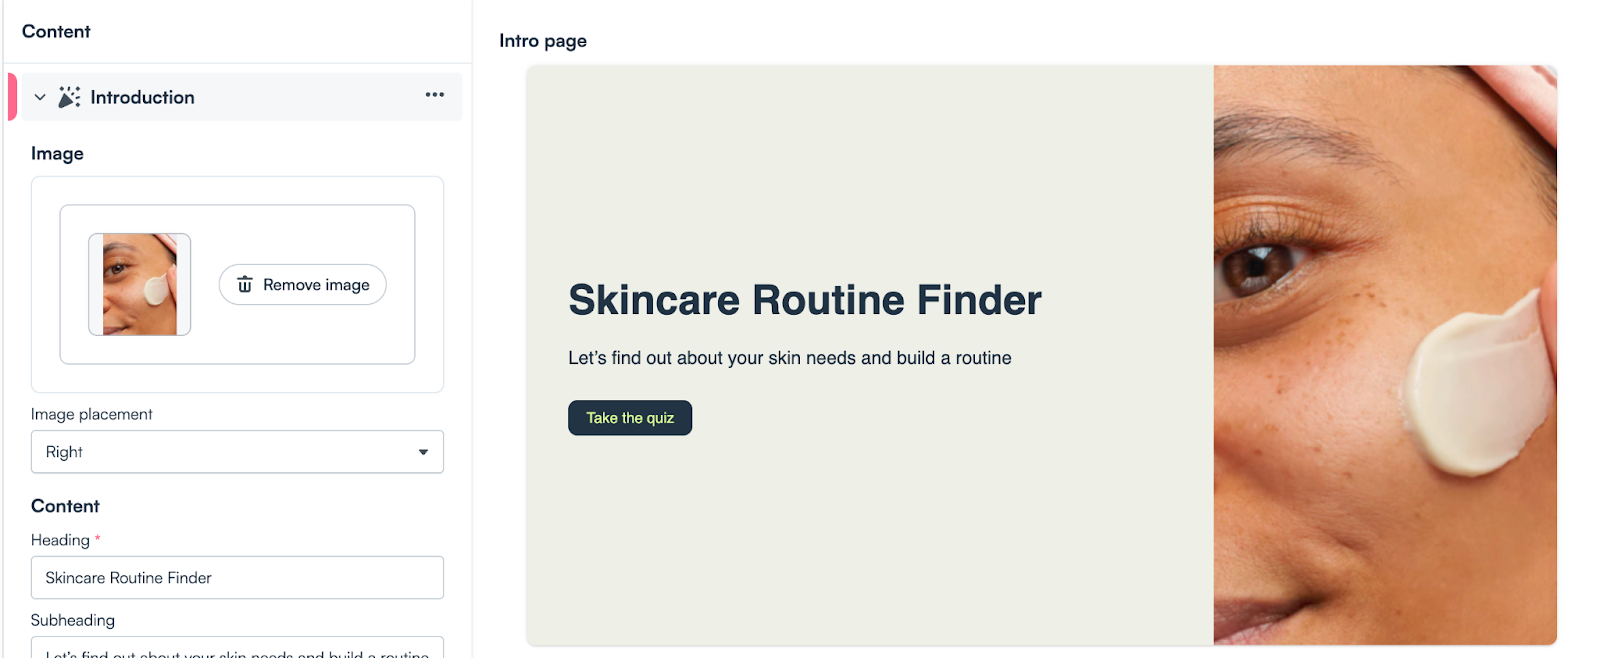
* **Introduction page**
The introduction page will be the first thing your customers see. You can place an engaging photo here and adjust its placement, such as setting it as a background, or positioning it at the top, left, or right. You can also tailor the wording to align with your brand.
* **Question page**
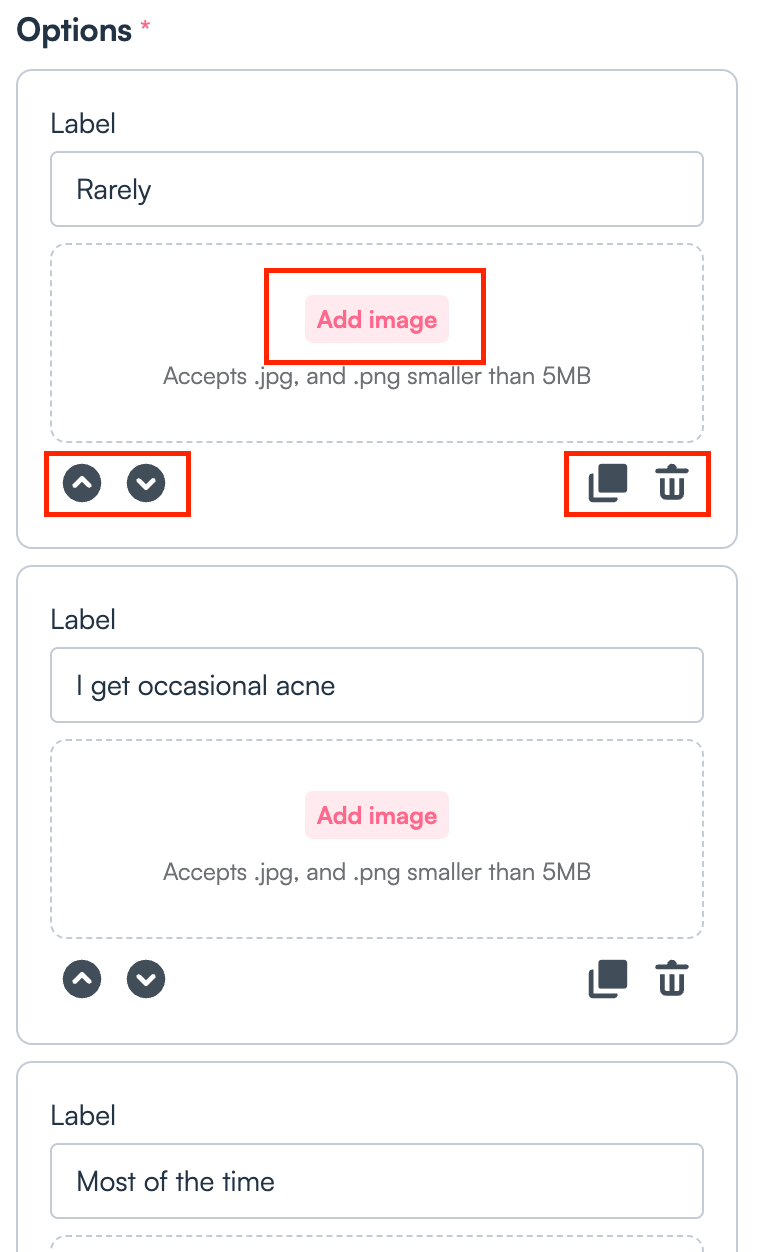
You can configure basic settings for your questions, such as making a question required or choosing between radio buttons and checkboxes.
{% hint style="info" %}
Checkboxes allow users to select multiple options from a set. Radio buttons are used when only one selection is permitted from a set of options.
{% endhint %}
You may easily modify each option, such as deleting, duplicating, reordering, or adding images to each option to help customers better understand the differences.
You may also find the **Add page** option at the bottom of the left-hand panel. Click the **Question page** to add new questions.
{% hint style="info" %}
Tip: When creating questions and options, think ahead about the products you plan to recommend to customers. Ensure the options correspond to specific products.
{% endhint %}
* **Recommended product page**
The recommended product page is what your customers will see after completing the quiz. This page will display their personalized recommendations. Apart from personalized recommendations which can be edited on the next page, you can customize the message you want to communicate to your customers.
You may also include an eye-catching image and adjust its placement, such as setting it as a background or positioning it at the top, left, or right.
#### 4. Set product recommendations
In this step, you can set the products you want to recommend. You have two ways to configure recommendations: using collections or selecting individual products.
{% hint style="info" %}
Tip: If your store already has collections set up, we recommend using this method. It allows you to provide customers with a range of products all at once, saving you the time of configuring each product individually.
{% endhint %}
{% tabs %}
{% tab title="Recommend collections" %}
Click **Add Collections** on the screen to see a list of your product collections.
Select the collection you want to recommend
These product collections are managed in your Shopify account. You may create or edit them by opening the **Products** > **Collections** tab in your Shopify admin. The collection’s title, description, and image will automatically be displayed on your quiz when recommended.
Click **Add Option** under the matching option section to add the options corresponding to the collection. You can select multiple options before clicking Apply options to apply them to your collection.
Once the setup is complete, you can preview the results by clicking **Preview Results**. In the next window, try filling out the quiz from a customer's perspective. Based on your responses, the corresponding collection will appear on the right-hand side.
You may also set priorities when the number of options matching a collection is the same. For example, you can prioritize the collection with the most products or the most recently updated collection. You may also configure a fallback collection to recommend when the customer’s selected options don’t match any collection.
If you're satisfied with your settings, click **Save** in the top-right corner, then Next to proceed to the styling settings.
{% endtab %}
{% tab title="Recommend individual products" %}
Click **Add products** on the screen to add your recommended products.
Select the products you want to recommend
You can click the **Add Option** button to link recommendation logic for individual products. Alternatively, you can select multiple products using the checkboxes on the left and then click **Bulk Assign Option**s in the top-right corner to connect options to many products in one go.
Select the options you want to match. You can select multiple options before clicking **Apply options** to apply them to your product.
Once the setup is complete, you can preview the results by clicking **Preview Results**.
In the next window, try filling out the quiz from a customer's perspective. Based on your responses, the corresponding products will appear on the right-hand side.
You may also set how many recommended products to display to your customers. For example, you could automatically recommend the top three products that match the most options.
You may also set priorities when the number of options matching a product is the same. For example, you can prioritize the product with higher price or the newest product.
You may also configure a fallback product to recommend when the customer’s selected options don’t match any product.
If you're satisfied with your settings, click **Save** in the top-right corner, then **Next** to proceed to the styling settings.
{% endtab %}
{% endtabs %}
{% hint style="info" %}
Reminder: If any options in your questions are not linked to a collection, or if any collection lacks matching options, a notification window will appear here to prompt you to review your settings. You can choose to address the issue or leave it as is. However, if you leave options unlinked, some customers might not receive product recommendations. In that case, you can also edit a Retry prompt message to let customers know they can retake the quiz.
{% endhint %}
#### 5. Set the styling
In this step, you can customize the design of your quiz. Adjust colors, fonts, and more to make the quiz align seamlessly with your brand.
**Font**\
You can edit the font style to your preference. Click the **Change** button on the text you want to modify, then select your desired font from the list. Alternatively, you can use your store’s default font. We will detect the font you’re already using for consistency.
You may also set the text size, such as for headings, body text, and buttons, to ensure they are appropriately scaled and visually appealing.
**Color**
You can also customize colors, including the background color, button background color, button border color, and font color, among others.
If you're satisfied with these settings, click **Save** in the top-right corner, then click **Preview Quiz** to move on to the next step.
#### 6. Preview your quiz
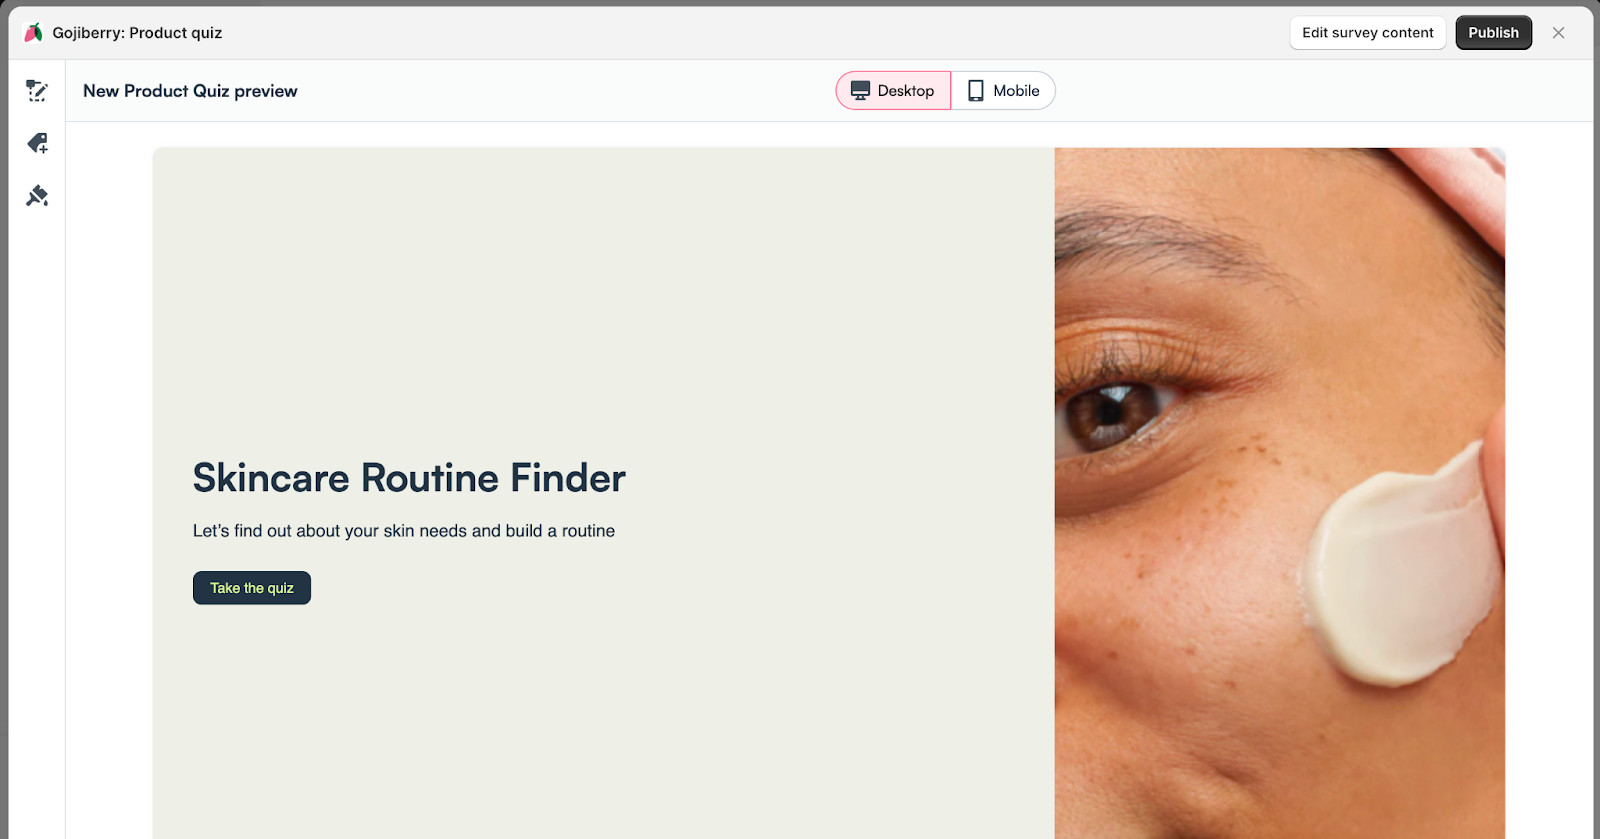
In this step, you can preview the appearance of your quiz and test it by completing it to see the recommended product results. If you're satisfied, click the **Publish** button in the top-right corner.
Congratulations! You've completed editing your quiz! The final step is to place the app block into your store. Once that’s done, your customers will be able to use the quiz!
\





 {% endhint %}
#### 5. Set the styling
In this step, you can customize the design of your quiz. Adjust colors, fonts, and more to make the quiz align seamlessly with your brand.
**Font**\
You can edit the font style to your preference. Click the **Change** button on the text you want to modify, then select your desired font from the list. Alternatively, you can use your store’s default font. We will detect the font you’re already using for consistency.
{% endhint %}
#### 5. Set the styling
In this step, you can customize the design of your quiz. Adjust colors, fonts, and more to make the quiz align seamlessly with your brand.
**Font**\
You can edit the font style to your preference. Click the **Change** button on the text you want to modify, then select your desired font from the list. Alternatively, you can use your store’s default font. We will detect the font you’re already using for consistency.